Saturday, August 22, 2015

Chocolate Pots De Creme

CHOCOLAtE POTS DE CRÈME
You'll flip when you see how easy and fast this recipe is. You'll REALLY flip when you take the first silky smooth, densely rich, melt-in-your-mouth delicious bite!
Author: 
Recipe type: Dessert
Cuisine: French-American
INGREDIENTS
  • 10 ounces semi‐sweet or bitter sweet chocolate chips, use good quality chips*
  • 1 large egg
  • 3 tablespoons sugar
  • 1 teaspoon vanilla
  • pinch salt
  • 1 cup heavy cream (or half & half)
  • 2 tablespoons Grand Marnier (optional)
INSTRUCTIONS
  1. Place 8-10 small bowls, pots, ramekins etc. on a sheet pan. Number of servings will depend on the size of your containers. This dessert is quite rich, so small servings are recommended. I got 9 servings out of it. My bowls hold ⅓ cup when filled to the brim.
  2. Place chocolate chips, sugar, egg, vanilla and Grand Marnier (if using) in a blender container. Starting on lowest speed, blend for 1 minute, then increase speed to medium for another minute. Turn off blender and set aside.
  3. In a 2-3 cup microwave-safe container microwave the cream on high for 2½ minutes or until cream is vigorously boiling. It will creep up the sides of the container. Let it get REALLY hot as you want it to cook the egg when it's poured into the blender.
  4. Immediately turn blender on low speed and blend for 15 seconds. Open lid slightly and slowly begin pouring in hot cream. Once all cream has been added, turn blender off and scrape down sides with a rubber spatula. Place lid back on securely and blend for 2 minutes on high speed.
  5. Pour into prepared bowls and refrigerate for at least an hour. Can be made 2-3 days in advance. Cover with plastic wrap when storing.
NOTES
*I used Ghirardelli 60% Cacao Bittersweet Chocolate Baking Chips
P.S. I told you I served this delicious dessert with freshly whipped cream and a drizzle of Mint-Basil Syrup. Talk about taking something wonderful right over the top, wow! It has so many delightful uses and makes the simplest things quite special. You’ll love it for your summer recipe arsenal.

Mint Basil Syrup
I think you will too. It’s delightful on fresh fruit, chocolate, ice cream, panna cotta, yogurt, pancakes, waffles, in lemonade, whipped cream, icings, ice tea ………. and a zillion other things. Whip up a batch for a little culinary magic. You never know when you might need a bit of redemption
MINT-BASIL SYRUP
A delightful fresh herb syrup that's super versatile & wonderful with fresh fruit, chocolate, ice cream, panna cotta, yogurt, pancakes, waffles, in lemonade, whipped cream, icings, ice tea .......... and a zillion other things. Whip up a batch for a little culinary magic.
Author: 
Recipe type: Sauce or Syrup
INGREDIENTS
  • ¾ cup water
  • 1 cup sugar
  • ½ cup fresh mint leaves
  • ¼ cup fresh basil leaves
INSTRUCTIONS
  1. Combine water and sugar in a small saucepan. Bring to a boil and stir until sugar has dissolved. Set aside to cool while preparing the herbs.
  2. Bring a medium size pot of water to a boil. Add herb leaves leaves and stir to submerge. Cook for 15 seconds, then immediately pour into a fine sieve* to drain. Rinse the herbs under cold water for 10-15 seconds to stop the cooking process. Don't omit this blanching step. This will keep your syrup bright green and fresh for days. If you don't blanch the herbs, the resulting syrup will turn a muddy brown color. Blanching also inhibits the growth of enzymes which will cause the syrup to quickly deteriorate.
  3. Allow the herbs to drain, then place between several thicknesses of paper towels and squeeze gently to remove excess water.
  4. Combine cooled sugar solution and blanched herbs in a blender. Puree for 2-3 minutes until mixture turns a bright green color and herbs are finely pureed.
  5. Pour into a bowl, straining through a fine-meshed sieve. Allow to sit for a few minutes to drain. Do not push on solids in sieve. Discard solids and transfer syrup to jars or containers with a tight seal. Will keep, refrigerated for several weeks. It can also be frozen in glass jars (leave ½ inch of space at the top) for a delightful summery treat in the middle of the winter!
NOTES
*The finer the sieve, the less tiny pieces of herb will be in your syrup. The syrup will also be more transparent when drained through a very fine-meshed sieve.
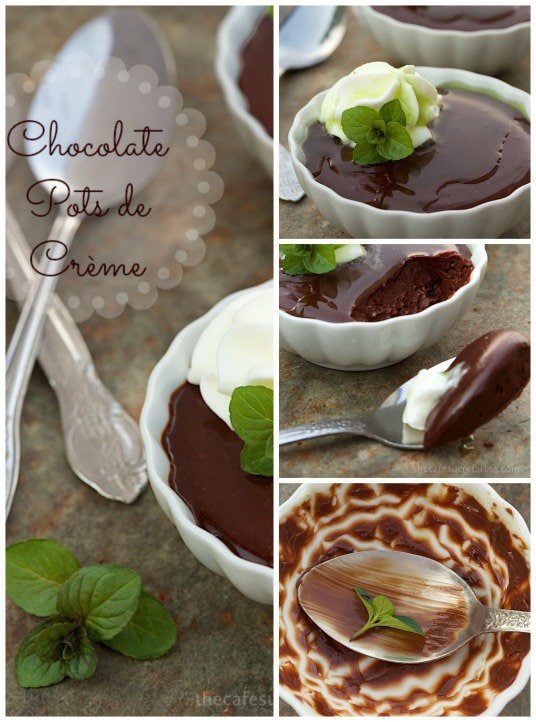
Chocolate Pots de Crème - this is one crazy-good, SUPER easy dessert!!

RELATED POSTS

Key Lime Tartlets

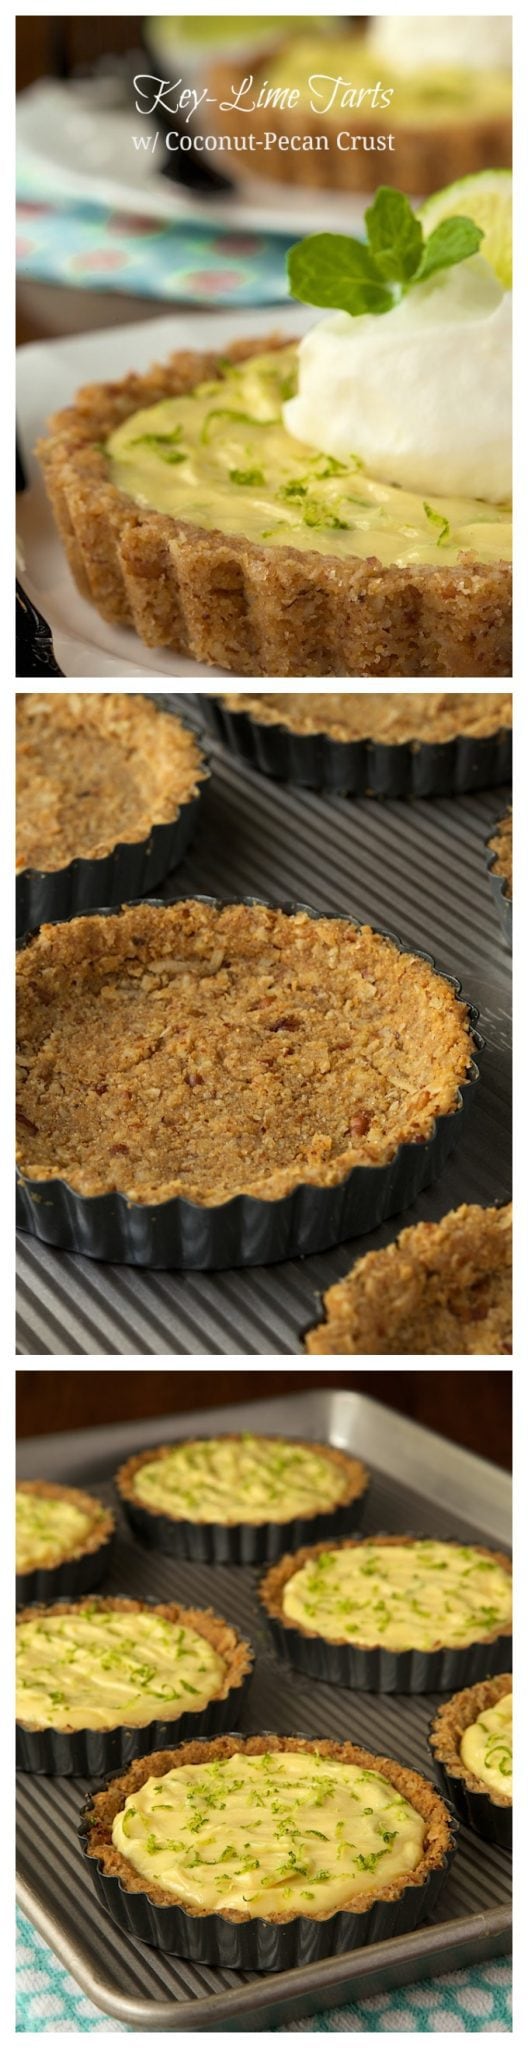
KEY LIME TARTLETS W/ COCONUT PECAN CRUST
 
PREP TIME
COOK TIME
TOTAL TIME
 
Author: 
Serves: 6
INGREDIENTS
  • 1¼ cups of graham cracker crumbs*
  • ¼ cup sugar
  • 8 tablespoons butter, (1 stick) melted
  • 1 cup pecans
  • ½ cup flaked shredded coconut
  • 5 large egg yolks
  • ¼ cup sugar
  • lime zest from 4 limes
  • ½ cup lime juice (from about 4-5 limes, depending on juiciness of limes)
  • 1 can sweetened condensed milk
  • ½ cup Greek yogurt
INSTRUCTIONS
  1. Preheat oven to 350˚F. Spray 6 - 4½-inch removable bottom tart pans with baking spray. Rub with a paper towel to evenly distribute spray. Line bottoms with parchment paper, if desired.
  2. Process graham crackers till finely ground. Add butter and sugar and process till combined. Add pecans and pulse 6-10 times or until coarsely ground. Add coconut and pulse 3-4 times, just till incorporated.
  3. Divide between 6 tart pans with removable bottoms. About ⅓ generous cup per pan. Press graham cracker mixture firmly up sides and into bottom of pans. Place tart pans on a sheet pan. Bake for 10 minutes. Remove from oven and cool completely.
  4. For the filling - in a medium heatproof bowl, whisk together the egg yolks and sugar until smooth and combined. Add lime juice and stir. Place bowl over a pan of simmering water and cook for 4-5 minutes, stirring frequently until mixture thickens. Remove from heat and add condensed milk, Greek yogurt and all but 1 teaspoon of the lime zest.
  5. Divide evenly between the baked crusts and sprinkle with the reserved lime zest. Freeze, uncovered for at least 2 hours. If not serving after this initial freezing, cover tightly with foil. Will keep for several weeks in the freezer. Remove from freezer 10-20 minutes before serving. Add a dollop of freshly whipped cream, if desired.
NOTES
* this is about 8-10 whole graham cracker sheets but weight will vary depending on the variety of graham cracker you use. It's best to crush them and then measure out 1¼ cups.
 Key Lime Tarts with Coconut Pecan Crust - if you're a key-lime lover, you'll go CRAZY over this. It's a classy step up from every day key lime pie!

RELATED POSTS

Best Ever Hot Fudge Sauce

Best Ever Hot Fudge Sauce   I like this web site, can't wait to try this! Her website is
www.thecafesucrefarine.com
At the bottom I will pin where she got her chocolate from

BEST EVER HOT FUDGE SAUCE
PREP TIME
COOK TIME
TOTAL TIME
Just like the name says, this stuff is seriously the best ever hot fudge sauce. What the name doesn't say is now super easy it is, so easy you'll hardly believe it!
Author: 
Recipe type: Dessert Sauce
INGREDIENTS
  • 6 ounces good quality semi-sweet or bittersweet chocolate, coarsely chopped (you also can use good quality semi-sweet chocolate chips)
  • ¼ cup sugar
  • 2 tablespoons butter
  • 1 teaspoon vanilla bean paste or vanilla extract
  • a pinch of sea salt
  • ½ cup half & half, a bit more to thin, if needed
INSTRUCTIONS
  1. Place all ingredients except half and half into a blender container.
  2. Measure half and half into a medium size microwave-safe bowl or measuring cup. Heat in the microwave on high power for 75-90 seconds or until it's vigorously boiling*. Make sure to use a big enough container to allow liquid to boil without rising over the top.
  3. Immediately pour over contents into blender and cover. Holding the lid to keep it securely in place, blend on medium-high speed for 1 minute. Remove cover and scrape down sides of blender container with a rubber spatula. Cover and blend again for another minute. Sauce should be smooth, silky and thick. Depending on the type of chocolate you use, the sauce may be too thick at this point. If you want to thin it a bit, add more half and half, 2-3 teaspoons at a time and blend briefly till combined. Continue until desired consistency is reached.
  4. Store in the refrigerator in an airtight container or glass jar. Keeps for 1-2 weeks. Sauce will get thicker when chilled, but will return to a looser consistency when warmed. Heat before serving on medium power in the microwave, stirring every 15 seconds until desired temperature.
  5. Makes approximately 1 cup of chocolate sauce
NOTES
*Half and half can also be heated on the stovetop over medium heat until vigorously boiling. Stir frequently.

I’ve made this dessert sauce a zillion times, but I have to say the French Broad chocolate took it way over the top. If you’ve got a get-together coming up and you don’t have time for a fancy dessert, don’t worry, no one will care. Pick up some good vanilla ice cream and whip up a batch of this Best Ever Hot Fudge Sauce. Everyone will think you’re a culinary whiz for making this heavenly, homemade chocolate sauce – just don’t tell them about the missing word that starts with an e.


P.S. French Broad Chocolate can be found in specialty shops all over the U.S. and can also be ordered directly from frenchbroadchocolates.com.
Disclosure: We were given French Broad Chocolate at the conference, but have not been compensated for this post. The opinions are our own.

Layered Cheesecake Jars with Raspberry Sauce and Ganache

LAYERED CHEESECAKE JARS WITH FRESH RASPBERRY SAUCE AND GANACHE
 
Golden, buttery graham cracker crust covered with light creamy cheesecake, a layer of silky smooth ganache and fresh raspberry sauce. A heavenly combination!!
Author: 
Recipe type: Dessert
Serves: 12-24, depending on the size of the jar
INGREDIENTS
  • Ingredients for the graham cracker layer:
  • 12 whole crackers graham crackers (about 6.5 ounces), crushed (about 1½ cups crumbs)
  • ½ cup (100g) granulated sugar
  • ½ teaspoon cinnamon
  • 4 ounces (113g) butter, melted
  • Ingredients for the cheesecake layer:
  • 3 8-ounce packages (681g) cream cheese, softened
  • ½ cup (100g) sugar
  • 1 14-ounce (397g)can condensed milk, sweetened
  • 4 large eggs, beaten
  • 1 tablespoon vanilla
  • ½ cup (113g) sour cream
  • Ingredients for the raspberry layer:
  • 2 tablespoons orange juice
  • 1 ½ tablespoons corn starch
  • 1 12-ounce jar strawberry jam, I use my Strawberry Freezer Jam, but your favorite strawberry jam will work fine.
  • 3 cups (375g) fresh raspberries
  • 1 teaspoon vanilla
  • Ingredients for the ganache layer:
  • 1 cup (240ml) heavy cream
  • 12 ounces (340g) good quality semi-sweet chocolate chips
INSTRUCTIONS
  1. For the graham cracker layer: combine graham cracker crumbs, butter and cinnamon in a medium size bowl and mix well. Press 2½ tablespoons into the bottom of 12 8-ounce mason jars.
  2. Place jars in a 9x13 inch cake pan and bake for 10 minutes. Remove from oven to cool slightly while preparing the batter.
  3. For the raspberry layer: combine orange juice and cornstarch in a medium size microwave-safe bowl. Stir till smooth. Add strawberry jam (yes, strawberries enhance the flavor of raspberries) and 1 cup raspberries, stir to combine. Microwave on high for 5 minutes, stirring half way through. Remove from microwave and stir in remaining 2 cups berries and vanilla. Smush whole berries slightly with the back of a spoon. Set mixture aside to cool then cover and refrigerate till ready to use.
  4. For the cheese cake layer: beat cream cheese and sugar with an electric mixer until very fluffy. Add condensed milk, sour cream and vanilla. Beat for 1 minute on medium speed. Scrape sides of bowl. Add eggs one at a time, beating well and scraping bowl after each addition. Beat on high for two more minutes.
  5. Divide batter among prepared jars, about ½ cup in each jar and return jars to the 9x13-inch cake pan. Add enough water to pan to fill the pan ¾ full. Bake at 350˚F for 30 minutes. Remove from oven and allow jars to cool to room temperature in pan.
  6. For the ganache layer: place cream in a medium size microwave safe bowl. Cook on high until cream is starting to simmer, about 3 minutes. Remove from microwave and immediately add chocolate chips. Allow mixture to sit for 1 minute, then stir slowly until thick, creamy and all chocolate is incorporated. (This take a few minutes, at first it will seem like it's not coming together but don't give up, it will!)
  7. Divide ganache between jars. Refrigerate for at least two hours.
  8. Divide raspberry sauce between the jars. Leave some space at the top. Screw lids on jars and store in refrigerator for up to 3 days. (To prepare further in advance, see instructions below regarding freezing.) Remove cheesecake from refrigerator about 30 minutes before serving for maximum flavor. Serve with long handled dessert spoons to allow guests to scoop up all the layers.
NOTES
To prepare more than 3 days in advance, prepare through the step 7. Allow to cool then cover and freeze for up to 1 month. To thaw remove from freezer and allow to sit at room temperature for several hours till thawed. Add raspberry layer after thawing.

To make even layers, I use a wide-mouth funnel to add each one.
You can use any type of jam you like. Raspberry would work well as would peach or apricot or blackberry. I really love the combination of raspberries and strawberries.

Candy Cane Swirled Fantasy Fudge

Another from pinterest I shall try!


CANDY CANE SWIRLED FANTASY FUDGE
 
The most fun, festive and delicious fudge EVER! Everyone goes crazy over it - and it's easy too!
Author: 
Recipe type: Sweet Treats
INGREDIENTS
  • 3 cups sugar
  • ¾ cup butter
  • ⅔ cup half and half*
  • 12 ounces white chocolate chips
  • 1 7-ounce jar marshmallow creme**
  • ½ cup finely crushed candy canes or peppermint candies***
  • 1 teaspoon peppermint extract
  • 2 teaspoons red food coloring
INSTRUCTIONS
  1. Line 9-inch square pan with foil, with ends of foil extending over sides. Spray pan with cooking spray and rub with a paper towel. Set aside. Also spray a small thin-bladed knife with cooking spray (a butter knife works well for this). Set aside.
  2. Combine sugar, butter and half and half in a sauce pan (at least 3 quart-size) over medium heat until mixture comes to a full rolling boil, stirring constantly (don't mistake bubbling at the edges for a full boil). Cook for exactly 4 minutes, stirring constantly. Remove from heat.
  3. Add white chocolate chips and allow to sit for 1 minute, then stir until all chocolate is melted and mixture is smooth. Add marshmallow creme and peppermint extract. Stir again until smooth and well mixed.
  4. Sprinkle peppermint over the top and gently fold it into the chocolate mixture. Stir just until combined (if you stir too much at this point, mixture will turn pink and the final product won't be as pretty.)
  5. Pour approximately half of mixture into prepared pan. Spread to cover bottom. Using a small spoon, sprinkle 1 teaspoon of the red food coloring in random drops over the surface of the fudge. Quickly pour the other half of the fudge mixture over the red food coloring. Spread evenly. Drizzle the other teaspoon in random drops over the top.
  6. Using the side of the prepared knife, run it back and forth through fudge creating a swirled pattern. Once you get a pretty swirly pattern, stop. If you swirl too much the whole mixture will turn pink. Cool completely (if you're in a hurry, like I usually am, refrigerate fudge till cool). Use the foil handles to lift fudge from pan before cutting into squares.
NOTES
*If you live outside the U.S., you may not be familiar with half and half. It's a convenience product frequently used in coffee here in the States. It's simply half milk and half cream.
** Marshmallow creme is a light, creamy marshmallow mixture that's sold in jars. If you can't find it, you can make your own. Try this version from AllRecipes. You can also purchase it online.
*** Make sure you crush the candy canes (or peppermint candies) quite fine - if the pieces are too big, the fudge will break apart when you try to cut it. Don't be tempted to add more crushed peppermint. I tried different amounts and it is perfect. When I added more, the fudge became grainy.