Saturday, August 22, 2015

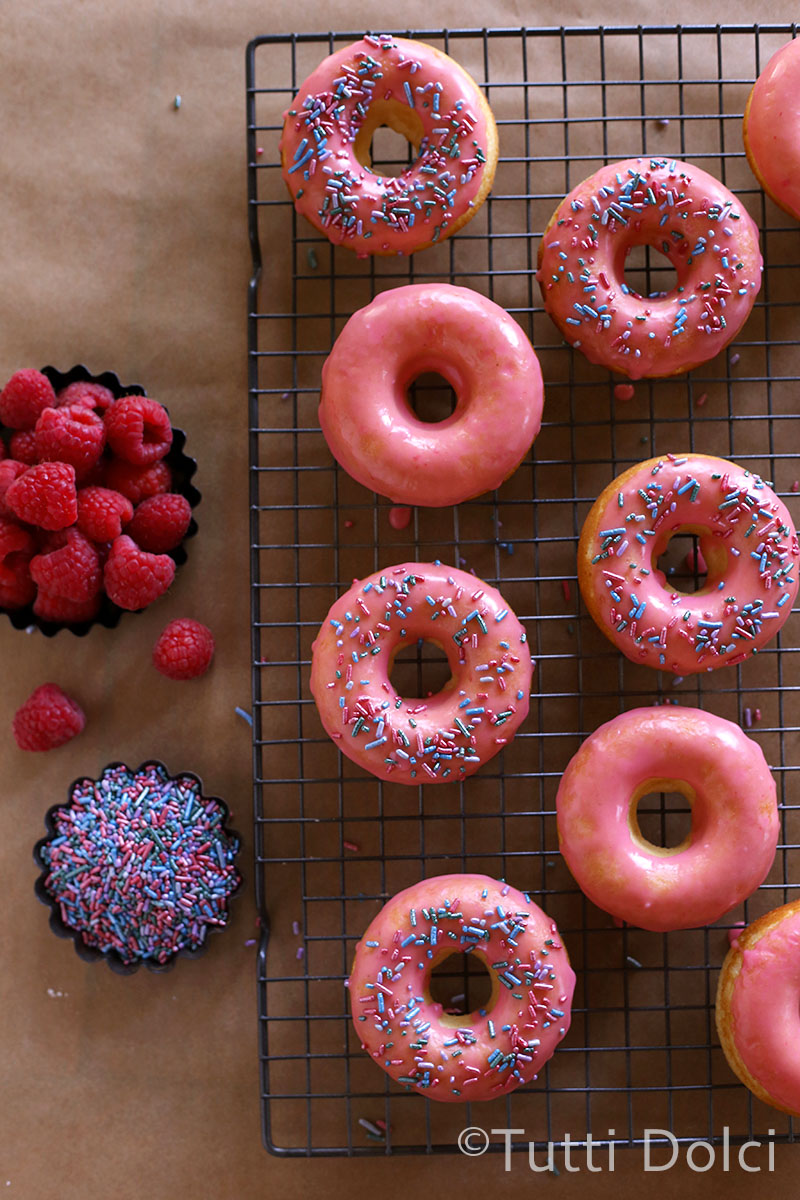
Raspberry Lemon Doughnuts


RASPBERRY LEMON DOUGHNUTS
Yield: 12 doughnuts
INGREDIENTS
  • 2 tsp Red Star PLATINUM Yeast
  • 2 Tbsp very warm water (120-130°F)
  • 2 Tbsp Meyer lemon zest
  • 3/4 cup sugar
  • 2 cups cake flour
  • 1 1/2 tsp baking powder
  • 1/4 tsp salt
  • 3/4 cup low-fat buttermilk
  • 2 eggs, lightly beaten
  • 2 Tbsp unsalted butter, melted
Glaze
  • 1 1/2 cups powdered sugar, sifted
  • 1 cup raspberries
  • 1 tsp Meyer lemon juice
  • 1/4 tsp Chambord (optional)
INSTRUCTIONS
  1. Preheat oven to 425°F and spray a standard doughnut pan with nonstick spray. Whisk together yeast and warm water in a small bowl; set aside. Place Meyer lemon zest and sugar in a food processor and pulse for 1 minute. Whisk together lemon-sugar, cake flour, baking powder, and salt in a large bowl. Combine buttermilk, eggs, butter, and yeast mixture in a medium bowl; add to flour mixture and stir just until combined.
  2. Spoon batter into a pastry bag fitted with a large round tip and fill each doughnut cup 2/3 full. Bake 6 to 7 minutes, until the tops spring back when touched. Turn doughnuts out on a wire rack to cool completely. Repeat with remaining batter, spraying pan with nonstick spray in between batches.
  3. For the glaze, place powdered sugar in a small bowl. Press berries through a fine mesh strainer, straining juice into powdered sugar. Whisk in lemon juice and Chambord until smooth. Set rack with doughnuts over a piece of wax paper. Dip doughnut tops into glaze and let set on rack. Doughnuts taste best the first day; if desired, store unglazed overnight in an airtight container at room temperature and glaze before serving.
NOTES
To make your own cake flour: place 2 tablespoons cornstarch in an empty 1-cup measure, then top up with flour. Sift the mixture several times to evenly distribute the cornstarch.
NUTRITION INFORMATION
Calories: 220

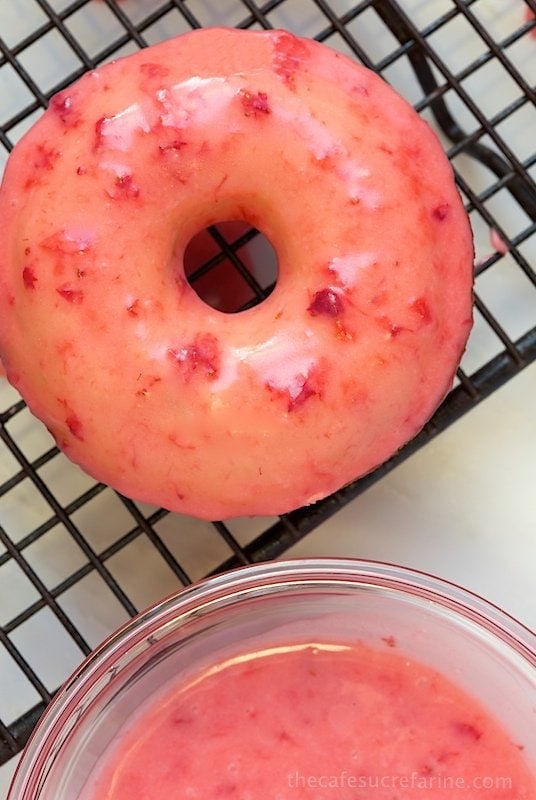
Baked Buttermilk Donuts with fresh strawberry Glaze


BAKED BUTTERMILK DONUTS WITH FRESH STRAWBERRY GLAZE.
Author: 
Recipe type: Breakfast, Brunch
Serves: 12
INGREDIENTS
  • 2 teaspoons dry active yeast
  • 2 tablespoons warm water (110-120°F)
  • ¾ cup sugar
  • 2 cups cake flour
  • 1 ½ teaspoons baking powder
  • ¼ teaspoon salt
  • ¾ cup low-fat buttermilk
  • 2 eggs, lightly beaten
  • 2 tablespoons butter, melted
  • 1 ½-2 cups powdered sugar
  • ¼ cup very finely chopped (or mashed) fresh strawberries
  • 1 tablespoon milk
INSTRUCTIONS
  1. Preheat oven to 425°F and spray 2 6-cup donut pans with nonstick spray.
  2. Combine yeast and warm water in a small bowl, stir to combine. Set aside till yeast is activated, (about 5 minutes - mixture will look like a cream foam when yeast is activated).
  3. Combine sugar, cake flour, baking powder, and salt in a large bowl.
  4. In a separate bowl, combine buttermilk, eggs, melted butter and yeast mixture. Stir well to combine.
  5. Make a well in the center of the flour mixture. Add liquid mixture and stir just until all flour is combined.
  6. Spoon batter into a gallon size zip lock bag. Cut one corner from bag and divide the mixture evenly between the 12 donut cups (about ⅔ full). For a picture tutorial of how to do this seeThe Baked Buttermilk Pumpkin Donut post.
  7. Bake 6 to 8 minutes, until the tops spring back when lightly touched. Allow donuts to cool in pan for 5 minutes then turn out onto a wire rack to finish cooling.
  8. For the glaze, combine 1½ cups of powdered sugar, strawberries and milk in a medium-size bowl. Stir well until all powdered sugar is incorporated. Add more powdered sugar till mixture is a thick, dip-able glaze.
  9. Dip doughnut tops into glaze and place on a wire cooling rack until glaze is set.

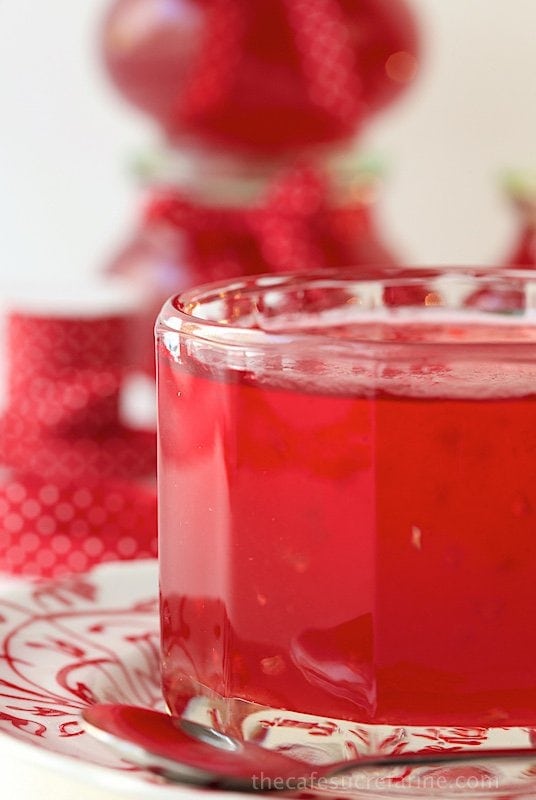
Cranberry Sriracha Pepper Jelly


CRANBERRY SRIRACHA PEPPER JELLY
 
This stuff is crazy good! We love it spooned over cream cheese and served with crackers but it also makes a wonderful glaze for chicken, pork, salmon, etc.
Author: 
Recipe type: Condiment
INGREDIENTS
  • 12 ounces fresh or frozen cranberries (about 3½ cups)
  • 2 3-4-inch jalapeno peppers, quartered and seeds removed and reserved*
  • 1 ¼ cup orange juice (I like the not-from-concentrate kind)
  • ¾ cup rice vinegar
  • 4 ¼ cups sugar (divided)
  • ½ teaspoon butter
  • 1 pouch CERTO Fruit Pectin
  • 4 teaspoons Sriracha sauce
INSTRUCTIONS
  1. Combine cranberries, jalapeños, orange juice, rice vinegar and ¼ cup sugar in a medium large saucepan (at least 6 quart-size). Stir and bring to a boil. Reduce to a simmer and cover pot with lid slightly ajar. Cook for 10 minutes. Watch carefully to keep mixture simmering but not cooking up over the top of the pot.
  2. Remove from heat and pour into a fine mesh strainer with a bowl set underneath to catch the juice. Push on solids gently with the back of a spoon to extract most of the juice. Measure juice and add enough water to equal 2 cups. You want exactly 2 cups of liquid.
  3. Wash pot and add 4 cups of sugar, cranberry juice mixture and butter**. Stir to combine and bring mixture to a full rolling boil (a boil that cannot be stirred down.)
  4. Add Certo pectin and stir constantly for exactly one minute.
  5. Remove from heat and skim off any foam with a metal teaspoon. Add jalapeño seeds and Sriracha. Immediately ladle into clean jars, leaving ¼-inch headspace at the top. Cover jars and allow to sit at room temperature for 24 hours then refrigerate for up to 3 weeks or store in the freezer for up to 6 months. Makes about 4½ cups of jelly or 9 4-ounce jars.
  6. Jelly can also be processed with a water bath at this point. I never do this as I'm a bit lazy and have plenty of freezer space.
NOTES
*It's a good idea to use gloves when handling jalapeños or any hot peppers as they can burn your skin.
** A small amount of butter will help keep mixture from foaming up to much when it simmers.
Regarding jam and jelly - this recipe is not difficult to make but jam and jelly making are an exact science. Be sure to measure carefully and accurately for good results. Setting a timer for the 1 minute cooking time will ensure that the consistency of your jam is correct. I love to improvise in the kitchen but not with jam and jelly unless I'm creating a new recipe and then it might take me 3 or 4 tries before I get it right.

Best Ever Super Easy Salsa

I have not tried this yet but I am going to, it looks good to me!

BEST EVER, SUPER EASY SALSA
 
Loaded with delicious vibrant flavor, this salsa comes together in less than 10 minutes. It's perfect to serve with chips, tacos or with other Mexican entrees, as a baked potato or omelet topping, soup garnish, etc.
Author: 
Recipe type: Appetizer
Cuisine: Mexican
INGREDIENTS
  • 2 14 ounce cans fire-roasted canned tomatoes puréed
  • ½ cup roasted red pepper (jarred), packed
  • 1 4-ounce can green chiles (these are not spicy, just add great flavor)
  • ½ small red onion, roughly chopped
  • ½ cup fresh cilantro (leaves and stems), packed
  • 6 medium green (spring) onions, cut in two inch pieces
  • 3 medium cloves garlic, peeled
  • 1-2 small jalapeño, seeded (if you like a spicier flavor, leaves the seeds in)
  • ½ teaspoon salt
  • 1 teaspoon ground cumin
  • 2 tablespoons fresh lime juice
INSTRUCTIONS
  1. Drain the tomatoes, reserving the juice.
  2. Combine all ingredients except reserved tomato juice in the bowl of a food processor. Pulse on and off until all ingredients are finely chopped and salsa is desired consistency. We like it a bit chunky, but if you like a smoother salsa, just keep pulsing. If you like a thinner salsa, add a small amount of the reserved tomato juice and pulse one more time.
  3. Taste for seasoning and adjust as needed. Serve with chips, tacos or other Mexican entrees, as a baked potato or omelet topping, soup garnish, etc.

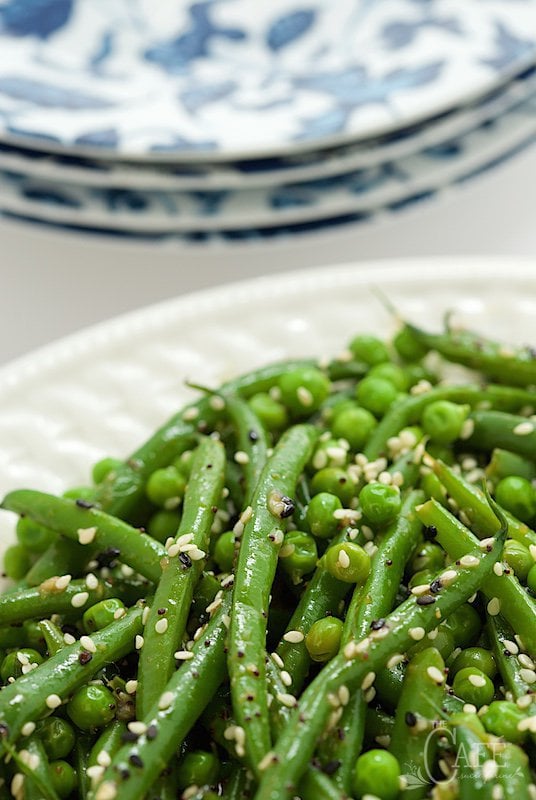
Sesame Ginger Green Bean Salad


SESAME GINGER GREEN BEAN SALAD
So easy and almost completely make ahead. Just throw it together at the last minute and expect rave reviews!
Author: 
Recipe type: Side
Serves: Serves 6
INGREDIENTS
  • 2 lbs. haricots verts or slender green beans, trimmed
  • 1 tablespoons sunflower (or other neutral tasting oil) oil
  • 1 tablespoon finely minced or grated fresh ginger
  • 2 tablespoons honey
  • 1 teaspoon soy sauce
  • 1 teaspoon sesame oil
  • 1 teaspoon sriracha sauce
  • 1 cup tiny frozen peas, thawed
  • 2-3 teaspoons light sesame seeds
  • 2-3 teaspoons black sesame seeds
INSTRUCTIONS
  1. Bring a large pot of water to a rolling boil. Prepare a large bowl of ice water (I do this right in my sink.) Have a large strainer ready to drain the beans.
  2. While water is heating, prepare sauce (glaze) by combining oil, ginger, honey, soy sauce, sesame oil and Sriracha in a small bowl.
  3. Add beans to boiling water and cook for 4 minutes, stirring occasionally (if your beans are really small and thin, only cook for 3½ minutes). Drain well and immediately plunge into the bowl of ice water (this will stop the cooking process) then drain again and allow to sit for 5 minutes. Shake strainer occasionally to remove as much water as possible.
  4. Spread drained beans out on several thicknesses of paper toweling or a clean kitchen towel and pat to dry as much as possible. At this point, beans can be wrapped in dry paper towels, placed in a ziplock bag and refrigerated till just before serving.
  5. Heat a large sauté pan over medium heat. Add sauce and stir continuously for 1-2 minutes or until sauce is bubbly and starting to thicken slightly.
  6. Add green beans and stir gently for 2-3 minutes or until veggies are glazed and warmed through. Add peas and sprinkle with about ½ teaspoon of kosher or regular salt and a generous grind of fresh pepper. Stir again for 30 seconds. Sprinkle with light and black sesame seeds. Serve hot or at room temperature.
NOTES
Sriracha sauce is a spicy chili sauce. You can find it in the Asian section at most larger grocery stores or online.

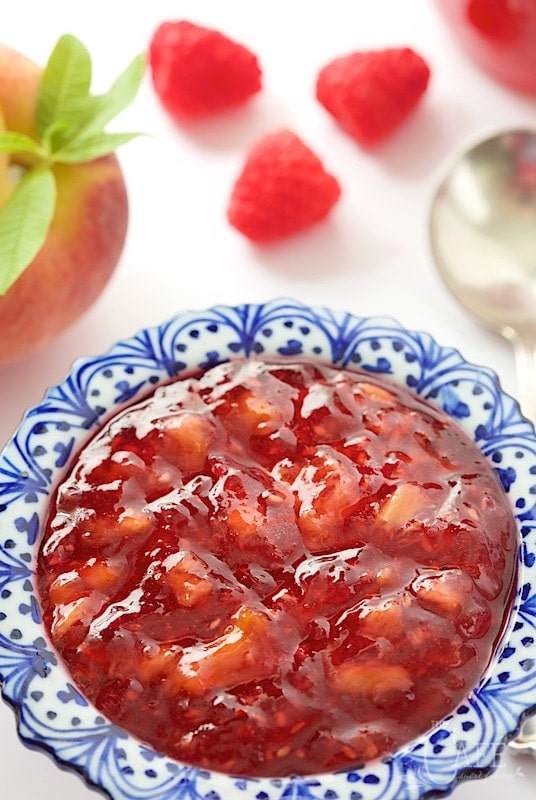
Peach Raspberry Freezer Jam

PEACH RASPBERRY FREEZER JAM
Take 30 minutes (yes, you read that right!) to throw together a batch of this yummy jam! It's really easy and you'll be thanking yourself when the cold winds blow!
Author: 
Recipe type: Condiment
Serves: 6 cups of jam
INGREDIENTS
  • 1 ½ pounds fully ripe peaches, about 4-6 medium size peaches
  • 2 cups fresh raspberries, about a pint
  • 4 ½ cups sugar*
  • 2 Tbsp. fresh lemon juice
  • ¾ cup water
  • 1 box fruit pectin**
INSTRUCTIONS
  1. Wash 6 small (1 cup) glass*** canning jars or plastic containers with lids. (If your jars are smaller, use more.) I like to put mine through the dishwasher. Dry thoroughly and set aside.
  2. Peel, pit and thinly slice peaches into a large bowl. Add raspberries and mash everything with a potato masher. Don't mash it too fine, you want little pieces of fruit to remain.
  3. Measure exactly*** 3 cups of fruit into a large microwave-safe bowl. (If you have extra, use on your morning yogurt or as an ice cream topping.)
  4. Add sugar and lemon juice; mix well. Place bowl in microwave and heat on high power for 3 minutes. Remove carefully (as bowl will be hot) and stir for 3 minutes.
  5. Take a little taste. If mixture is still a little grainy (sugar not dissolved) return to microwave for another 2 minutes, then stir well.
  6. Mix water and pectin in small saucepan and stir to combine. Bring to boil on high heat, stirring constantly. Cook and stir for 1 minute. Add to peach mixture; stir for 3 minutes.
  7. Fill all containers immediately to within ½ inch of tops. Wipe off top edges of containers; cover with lids. Let stand at room temperature 24 hours. Refrigerate up to 3 weeks or freeze up to 1 year. (If frozen, thaw in refrigerator before using.) Makes 6 cups of jam.
NOTES
* Jam making is a precise science - this is not the time to guesstimate or measure carelessly. It will show in your results, jam that is too thick or too thin.
** Powdered pectin is available in most larger grocery store. It's sometimes tricky to find, so just ask. I usually use Sure Jell although I've also had success with the generic Kroger brand (and it's a lot cheaper!).
*** Lots of people have asked if it's safe to freeze jam in glass jars. As long as you leave at least a half inch of space at the top for expansion, it works just fine.

Oh, and speaking of jars, I get lots of emails asking what kind of jars, cruets, bowls, etc I use. I’m always on the look out for fun stuff like this, not only for the blog (I’m what they call a prop junkie) but also for gift giving. These particular jars, Bormioli Rocco Quattro Stagioni are made in Italy, are reasonably priced and make a simple jar of jam look quite classy. I love the one piece lids too instead of a lid and ring like most canning jars have.

Chicken and Fresh Berry Salad


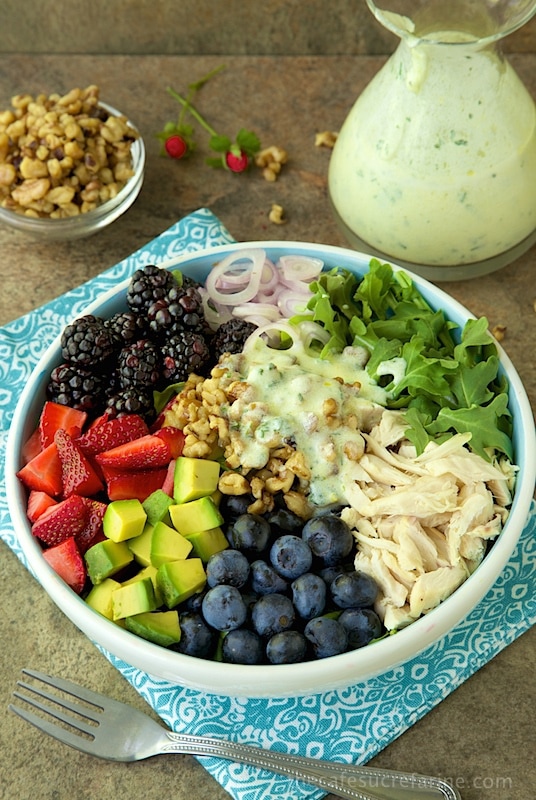
CHICKEN AND FRESH BERRY SALAD
 
A delightful summer salad. Berries can be switched, depending on what's available and in season. The dressing is lemony & creamy (without mayo) and loaded with fresh herbs. An easy recipe for candied walnuts is included.
Author: 
Recipe type: Salad
INGREDIENTS
  • For the dressing:
  • ¼ cup buttermilk
  • ¼ cup Feta cheese
  • 1 small clove garlic
  • ¼ cup Greek yogurt
  • 1 teaspoon Dijon mustard
  • 2 teaspoons fresh lemon juice
  • 1 teaspoon lemon zest, from 1 small lemon
  • ¼ cup olive oil
  • 1 tablespoon finely chopped fresh basil
  • 1 teaspoon finely chopped fresh chives
  • 1 teaspoon finely chopped fresh thyme
  • 1 teaspoon fresh rosemary
  • salt, to taste
  • freshly ground black pepper, to taste
  • For the candied walnuts:
  • ½ cup walnut pieces
  • ½ teaspoon extra virgin olive oil
  • 1 teaspoon honey
  • a pinch of kosher salt
  • For the salad:
  • 6 cups baby arugula
  • 1 ½ cups of each fresh berries, feel free to use whatever types are freshest and available. I used strawberries, blackberries and blueberries
  • 1 large avocado, peeled, cored and diced
  • ½ cup sliced shallot or red onion
  • 3 cups shredded rotisserie chicken breast
INSTRUCTIONS
  1. Combine buttermilk, Feta and garlic in a blender container. Blend on high for 1 minute until smooth and creamy. Transfer to a medium size bowl.
  2. Whisk in Greek yogurt until smooth. Add mustard, lemon juice and lemon zest and stir to incorporate.
  3. Drizzle in olive oil in a steady but very slow stream. Don't try to drizzle the oil in too fast or dressing will come out very thin. As you slowly add the oil, the dressing is emulsified, which means the oil and the buttermilk/yogurt mixture become one.
  4. Add fresh herbs and stir to combine. Take a taste and add salt and freshly ground pepper as needed.
  5. For the walnuts, preheat oven to 350˚F. Combine walnuts, olive oil, honey and a pinch of salt in a small oven-safe pan. Bake for 8-10 minutes or until golden, stirring every 2-3 minutes. I recommend using a timer. Watch carefully as they can go from golden to burnt in a heartbeat. Set aside to cool, stirring occasionally to keep nuts from sticking to pan.
  6. For the salad, place a handful of arugula in the bottom of four shallow bowls. Arrange berries, avocado, chicken, shallot or red onion and more arugula in sections. Add a scoop of candied walnuts in the center of each salad. Drizzle each salad with dressing or pass dressing at the table.